Keum Boo

Keum Boo is a jewelry technique originating from Korea. It is attaching gold leaf to another metal, usually silver or copper. Most on-line directions say to use fine silver. However, with a little preparation, sterling silver works fine. The preparation process involves slightly melting the surface of the sterling then putting it in jewelry pickle. Directions on-line say to do that process 5 to 7 times but I found that just once works.

Keum Boo Jewelry

I’m not going to go into the process of keum boo, a good book with instructions is Heat, Color, Set & Fire, by Mary Hettmansperger. It’s in the Austin Public Library. The book also has instructions for several other interesting jewelry techniques, I’ll be trying them as well. Keum Boo was the most interesting to me so that’s where I started.

              Here are a few photos of my new work that was inspired by Ms. Hettmansperger’s book.

A Small Adventure

This happened at Ink’s Lake, a small lake in the chain of lakes on the Texas Colorado River. My wife and I were camped in our Casita Travel Trailer at Ink’s Lake State Park. It was a sunny, beautiful December day...except for the wind. We were doing a partial circumnavigation of the small lake in our kayaks. My wife was in her 17’ cedar-strip-built boat and I had my 17’ boat made from 4mm marine plywood. The boats are relatively the same shape and weigh about the same, 35 lbs. However, they are entirely different in the way they handle. The strip-built boat has soft chines (rounded lower edges) and the plywood boat being constructed using the stitch-and-glue method has relatively hard chines (sharp lower edges). The strip-built boat cruises and the plywood boat just adequately moves through the water.

            My wife and I are very experienced paddlers. We have been kayaking for more than 20 years, since I built my first kayak in the mid ‘90’s. We’ve paddled many lakes and streams and enjoy being on the water in our kayaks. A few years ago, with rented kayaks, we had an excellent paddle a few miles on the north coast of the Olympic Peninsula. We paddled from the kayak rental to the Port Townsend Wooden Boat Festival. Seeing the beautiful wooden boats from the water was a special experience. But that’s another story.

            Normally the differences in our boats is not a consideration. In most conditions they are stable, track well and turn well. That day was not a normal day. It started with 10 to 15 knot winds and slowly built to a good 20 to 25 knots with higher gusts. There is not a long fetch at Ink’s Lake so the waves were not large but that kind of wind makes it very choppy.

            We had planned our trip so that the wind would be to our backs on the way back to camp. I soon learned that even though the wind was to my back my boat was becoming uncontrollable. It was pitching and yawing so much that I couldn’t control it. It was not fun and it felt actually dangerous. If I had capsized, hypothermia would be a real issue. Meanwhile, Dena with some effort was doing fine. Her boat was pitching around but not nearly as much as mine. We were passing some lakefront houses and I felt that I had no choice but to go ashore. My wife was ahead of me but soon realized that I was not following her. She turned around and joined me. She at first couldn’t understand way I had stopped, she was doing fine. When I told her how my boat was handling and how I felt, she understood. We reasoned that the wind would decrease in the late afternoon and we could then continue to our campsite. We had plenty of water and snacks, we could just relax and wait.

            Using my cell phone, we attempted to use uber and then lyft, two rideshare services, but no cars were available in our area. Getting comfortable and waiting seemed to be the only option. After a time, a person from one of the nearby houses came to our rescue. He gave us a ride to our campsite, we got our car and brought our boats back.

            I am now in the process of building my strip-built kayak.


Building Wooden Model Ships

Building Wooden Model Ships

            Wooden model ships can be built from kits or from “scratch”. Kits usually include castings of things like cannons, cleats, binnacles, etc. and wooden parts such as blocks (pulleys) and belaying pins. Building from scratch means that the builder constructs all of those things him or herself, making it muchmore difficult. Kits from suppliers such as Artesania Latina will supply the above plus pre-cut frames, deck houses, wood for inside and outside hull planking and deck planking, sails, thread for lines and almost everything needed to complete the model. 

            Wood parts generally do not need much shaping except for the wood for the spars. Wood for spars, masts, booms, etc. are simply dowels and need to be tapered accordingly. I use a stationery belt sander or disc sander, tighten the end of the spar in the chuck of a variable speed drill. While rotating the spar with the drill, carefully push the dowel against the running sander. With some practice and good hand/eye coordination you can make a good looking tapered piece.

            Other tools needed and recommended are head mounted magnifiers used for making jewelry and other close work. Sharp pointed tweezers, various files, wire cutters, drill bits, very sharp blades such as utility knives, clothes pins (for clamps) and measuring tools such as metric scales and calipers. A small hammer or a special pin pusher is useful for attaching the inner planking. Modeler’s putty such as Grumbacher’s is used for smoothing the inner planking. Several different grits of sandpaper will be needed. Various small reachers and grabbers for doing the rigging are useful, the list goes on and on. 

            Different glues and adhesives are necessary. I like Aleene’s Quick Dry Tacky Glue, and G-S Hypo Cement is good for reaching hard to get to places. Be careful of superglue, it can be useful for many applications, but it can be highly toxic! It can make you very sick. It doesn’t affect everyone but if you are allergic to it like me use it very sparingly. 

            If you are a beginner modeler choose a relatively simple kit such as the Virginia American Schooner by Artesania Latina. It isn’t easy and will test your skills but it will give you an idea of what is in a good kit and what tools and skills are needed. 

            I recently completed the Bluenose II kit from Artesania, it was a very difficult project. It is a beautiful model but very challenging! The joy is in the building of the model and the greater the challenge the greater the joy. That kit is considered intermediate by professional modelers and Artesania says, “Recommended for initiated modelers.” It was the most difficult model that I have attempted. It turned out well but not perfect by any means. After I complete a few other projects I may go back and re-do some things. I of course can see all of my mistakes and shortcuts but to all except experienced modelers it probably looks amazing.

            The instructions for Bluenose II are excellent. They include text and photos and are relatively easy to follow. In contrast, the instructions for the Pen Duick model by the same company are severely lacking. The text is incomplete and the photos are somewhat blurry and far from complete. The model is also not to scale, some of the rigging is just not there. It looks beautiful from a distance but is somewhat a disappointment. 

            The take away from my experience with these two models is that if you choose to build a wooden ship model do all of the research that you can. Read all of the reviews that you can find. Don’t choose something too easy but don’t pick something that will discourage you from continuing with this very satisfying pursuit. 

            Email me with questions, rhodesm1@swbell.net.

IMG_1402.jpg
IMG_1250.jpg

My Jewelry

How do they do that? I had that thought years ago while looking at some hand-crafted jewelry at one of the open studios in an East Austin Studio Tour. It was a stone of some kind set in a sterling silver pendant. I thought that it must not be terribly difficult to do, there was jewelry like that everywhere. But how was it done? Later I learned that the stone was called a cabochon, and it was bezel-set.

                  When I started taking jewelry making classes at Austin Community College one of the required projects in the beginner class was to bezel set a stone. You measure the length of the bezel wire by bending it around the stone. Then you use a torch to silver-solder the ends of the bezel together, solder it to a backing plate and set the stone in it. That is much easier said than done.

                  The silver has to be prepared correctly or the solder won’t run, the amount of heat and type of solder has to be correct or it doesn’t work. You could easily end with a lump of molten silver. But with proper instruction and some practice I learned to make a simple bezel-set pendant, a nice craft project but little or no artistry.  

                  Countless things can be done with a bezel-set stone. Simple techniques, like changing the color and shape of the stone or the size and shape of the backing plate can completely change the look of the piece. Fold-forming, melting and hand sawing silver can produce endless variations. My goal is to add artistry, to make every piece a little different from what I have made before.

                  So, what is art and how does a person become an artist? There are as many definitions of art as there are people defining it and I’m not sure that a person can learn to be an artist. I think that an artist has to be born. Is my work art or craft? If you are reading this, you have seen my work. You be the judge.

                  My definition of art is something that affects me intellectually and emotionally. Does it make me think? Does it somehow make me feel good, or make me feel anything? When I make a piece, I try to make it at least interesting and, at best, artistic. Like most of us, I am my biggest critic. As the cartoon character Pogo famously said, “I have met the enemy and he is us.” I think that most of my work is good, it is something to look at and some of it I greatly enjoy wearing. I hope that you, the reader, feel the same.

My shop.

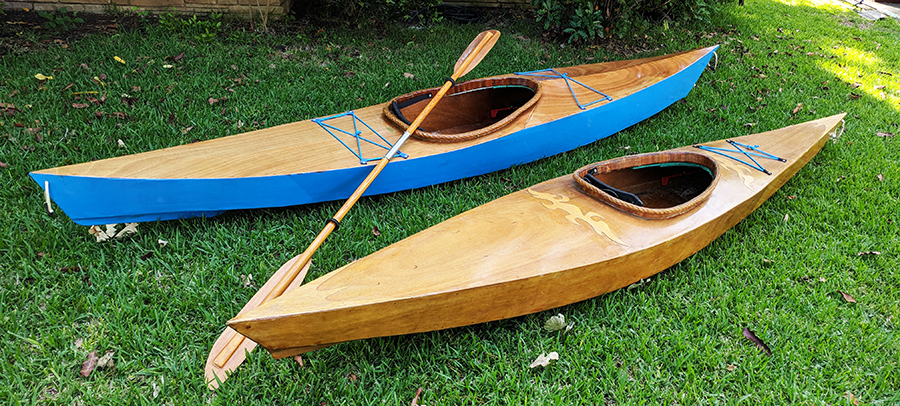
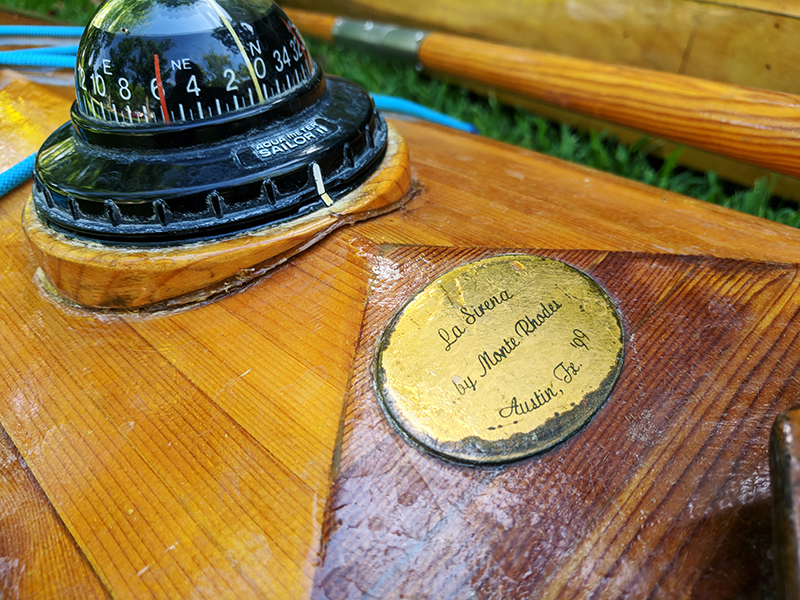
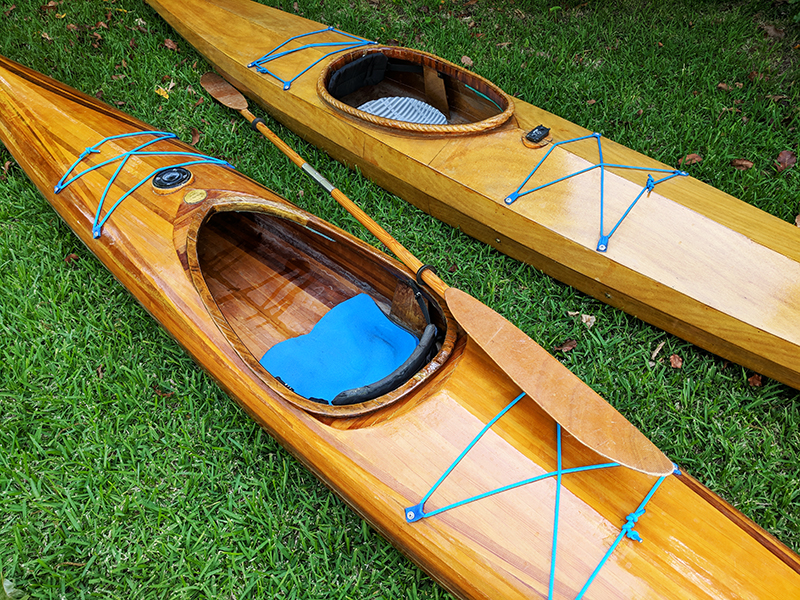
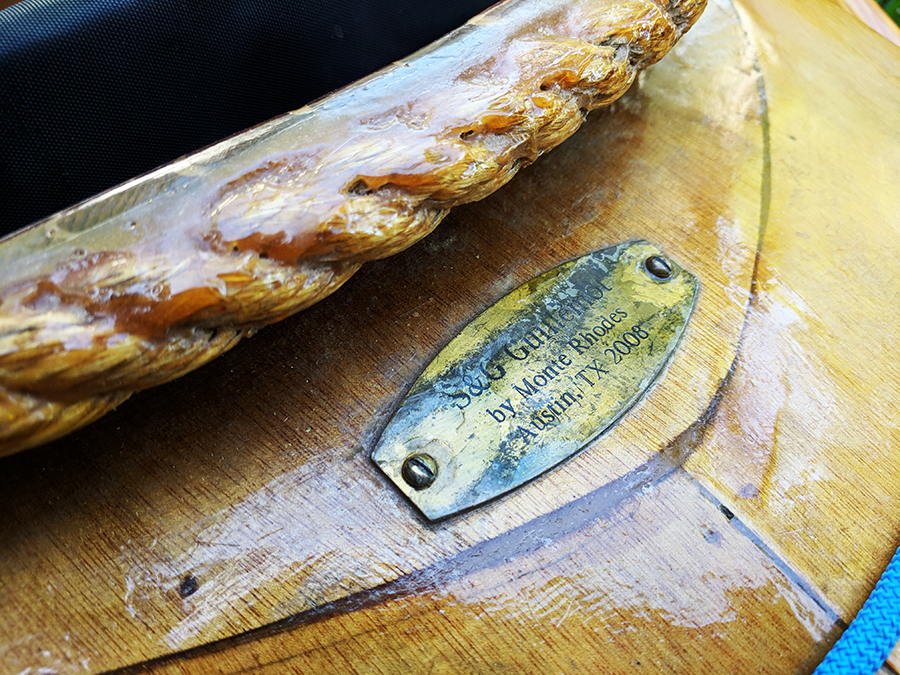
            As any good workshop, mine has evolved over the past many years. It started as being a good place to build small model wooden boats. It had a place for glue, a small fine-toothed saw, sandpaper and various hand tools.

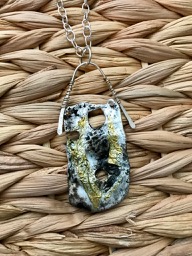
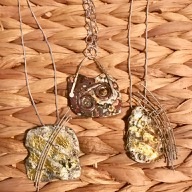
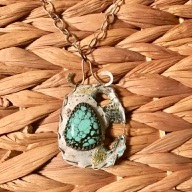
            About 10 years ago it became a place to make wire-wrap jewelry. A few basic hand tools had been added, like wire cutters and various tools to shape wire. There were places to hang different gauges of wire with bowls and boxes to keep stones and beads. It also had a CD player for listening to audio books while I worked.

            When I had learned all that I wanted to learn about wire-wrap I started going to jewelry making classes at Austin Community College. ACC is an excellent school - very experienced instructors with good equipment and reasonable costs.

            I soon learned that silver soldering required a torch. My wife had purchased a small butane powered torch for the kitchen. I used it at home for some simple projects. It was barely adequate but better than nothing. The ACC jewelry lab used oxygen-propane torches, my instructor suggested a certain model so I started my research. When I found the model number for what I wanted, a Google search showed that prices varied widely. The price on the one I purchased was almost $200 less than the highest price. Isn’t the internet amazing.

            A word about price for jewelry making tools. You often don’t get what you don’t pay for. For example, a set of small needle files costs around $10 at places like Harbor Freight. A good set is more like $75. If you are serious about making quality jewelry buy the good set. When you start to use them, the difference is immediately obvious. And yes, many of the tools that I purchased at Harbor Freight, like metal cutting snips, tweezers and hammers work just fine.

            Another thing that I soon learned is that I couldn’t continue to listen to audiobooks while I worked. While doing wire-wrap I didn’t have to think very much, the designs and pieces just came out of my fingers. Doing even basic silversmithing takes focus. Using the right amount of heat and the shape of the torch flame is critical. Not enough heat and the solder doesn’t flow, too much heat and you get a blob of silver. Concentrating on only one thing at a time is necessary.

            A major tool that is very useful, difficult to do without, is a flex-shaft. It has a variable speed motor that is usually mounted high on a stand. There is a 3-foot flexible shaft from the motor to a handle with a keyed chuck. The chuck holds drill bits, grinding and polishing tools and various other implements. The motor speed is controlled by a foot pedal. A very handy implement that I added is a tool that vibrates and adds texture to silver. The quality of the foot speed controller is important. The one that came with the flex-shaft that I purchased was not sensitive enough for the slow speed required for drilling very small holes in silver. I had to purchase a different foot speed controller, about $40. Do your research before you buy.

            I found that I needed something to hold various tools like tweezers, steel files, marking pens, etc. I went to the local Lowes to find a holder of some kind. A very helpful person there made a suggestion. I cut a piece of one inch diameter PVC pipe to different lengths, about 4” to 10”. Attached together in an upright position they hold long, slender tools perfectly. You can attach the pieces together with strong tape but heavy nylon wire-ties work better.

            My shop is in a back room of our house. It has several windows with good, natural light. I have one of those very adjustable clamp-on lamps, I think it’s called an architects lamp. I also have a full spectrum floor lamp that peers over my left shoulder, directly lighting my work.

            The work bench is an old, heavy desk similar to a teacher’s desk. A wide, flat surface with drawers on one side. I attached a piece of ¾” plywood two feet high in an L shape to make a small, 3’x 2’ two-sided wall. It sits toward the back of the table. Nails and screws strategically placed hold coils of silver wire and tools. It’s painted white, with outlines showing where things like hammers, snips, pliers, jewelers saw are hung. There is a bowl for quenching water, a slow-cooker for a pickling pot and a holder for the torch. Plastic containers for solder, small piles of sandpaper, polishing cloths, whatever are scattered but in easy reach. Okay, my workbench is a cluttered mess. It’s an organized mess and I know where everything is. It could be prettier but it’s where I find great joy and a fine sense of accomplishment.


Before jewelry was boatbuilding.

            Before I became captivated by designing and making jewelry I was obsessed with building wooden boats. In the mid 90’s I built a few small wooden boat models from kits. One evening I was working on one when my dear wife said something like, “Why don’t you build us a real one...ha, ha, ha.” Hmmm, I thought, why not. After some research, I ordered the plans for and completed a small wooden dory.

            That first boat was in some ways the most interesting and certainly the most challenging of all my boats. The advertisement for the plans clearly stated, “Comes with complete building instructions.” When I opened the plans, one 8½” x 11” hand written page came fluttering out. About 10 numbered steps were written on yellow lined paper, very elegant. They were the “complete” building instructions. To make it worse, the dimensions on the plans were in metric! But I was not discouraged. After much thinking, a lot of sweat and not too much blood I had a beautiful wooden dory. It not only looked great it rowed very well. I sold it to a coworker, I knew that I would be building more boats.

            When a friend saw the completed dory, he asked me to help him build a kayak from a kit that he had purchased. He had started it but soon realized that he needed help. It was an 18-foot sea kayak, a stable and comfortable boat. That was my first kayak. After that came more kayaks, three sailboats, two canoes and then more kayaks. I’ve completed 17 boats in all.

            My “shop” is a one car garage where I keep tools and a two-car carport where I build my boats. Except for mid-summer, working outside in Austin is generally pleasant.

I built a worktable on large rubber casters. It can be moved so that both cars can still park undercover. I take the table apart and store it in the garage when not in use.

            Most of the boats were sold, one I gave to a friend and one sailboat was such a bad design that I cut it up and it went to land fill. Four of the kayaks are in the garage or under the carport. The last one I built, a 14-footer is for sale. Contact me if you are interested.

            My wife and I enjoy kayaking and are paddling on local lakes most of the year. All of my kayaks are sit-inside. We wear a spray-skirt that keeps us mostly dry in a rain shower and keeps water out of the boat. It also keeps the sun off of our legs in the summer.

            I’m thinking about building one-more-boat. It will be a 17-foot sea kayak built with cedar strips. It’s similar to one that we have had for 20 years but will be lighter weight and even more beautiful.